

What’s Supported
Supported Actions
This connector supports:- Read Actions, including full historic backfill. Please note that incremental read is supported for
do-not-call-lists,record-lists,promptsandcampaignsonly. For all other objects, a full read of the Talkdesk instance will be done for each scheduled read. - Write Actions.
- Proxy Actions, using the base URL
https://api.talkdeskapp.com.
Supported Objects
The Talkdesk connector supports reading from the following objects:- contacts
- ring-groups
- do-not-call-lists
- campaigns
- record-lists
- identity/activities
- attributes
- attributes-categories
- fsi/contacts
- prompts
- prompts-usage
- live-queries
- guardian/users
- guardian/logs/sessions
- guardian/cases
- guardian/calls/call-quality
- users
- scim/v2/Users
- scim/v2/ResourceTypes
- scim/v2/ResourceTypes/User
- scim/v2/ServiceProviderConfig
- account
- account/wallets
- account/bucket-configurations
- cm/core/va/cases
- cm/meta/va/fields
- bulk-imports/users
- cfm/flows/external/results
- express/accounts
- express/products
- express/subscriptions
- express/invoices
- express/usage/month
- industries-scheduler/teams
- industries-scheduler/appointments
- do-not-call-lists
- campaigns
- record-lists
- digital-connect/conversations
- attributes
- attributes-categories
- wfm/aion/externals/schedules/time-offs
- fsi-workspace/contacts/synchronizations-from-core
- fsi/transfers/internal
- fsi/transfers/external
- fsi/transfers/international
- prompts
- prompts-requests
- live-subscriptions
- interaction-custom-fields
- scim/v2/Users
- cm/core/va/cases
- express/provisioning/account
- eas/simulated-emails
- industries-scheduler/availabilities
- industries-scheduler/appointment
Example integration
For an example manifest file of a Talkdesk integration, visit our samples repo on Github.Before You Get Started
To integrate Talkdesk with Ampersand, you will need a Talkdesk Account. Once your account is created, you’ll need to register an OAuth app and obtain the following credentials:- Client ID
- Client Secret
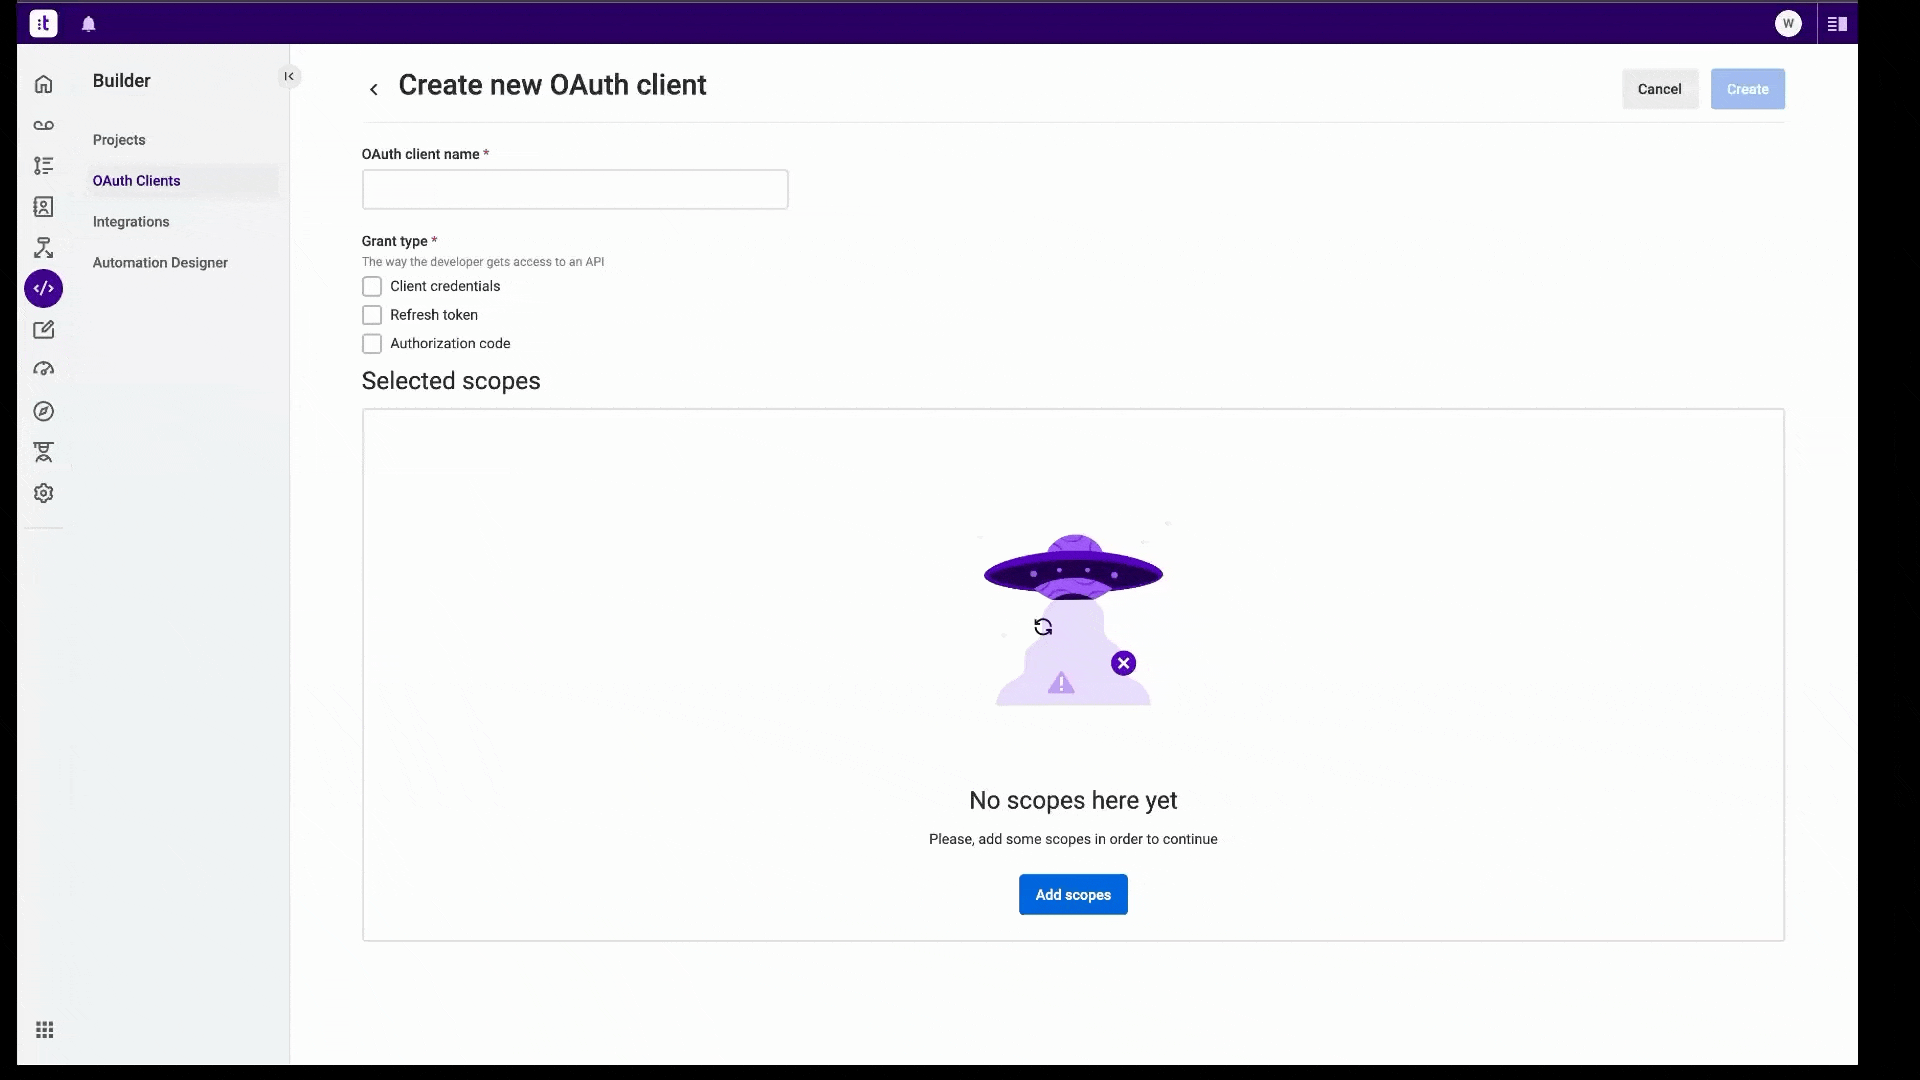
Creating a Talkdesk OAuth App
Follow the steps below to create a Talkdesk OAuth app:- Log in to your Talkdesk workspace.
- Go to Builder > OAuth Clients.
- In the OAuth 2.0 section, click on Create OAuth client.
- Enter the following details:
- OAuth client name: Choose a name for your OAuth client.
- Grant type: Select the Authorization Code and Refresh Token as grant type.
- Redirect URI: Enter
https://api.withampersand.com/callbacks/v1/oauth. - Scopes: Select the scopes you want to use for your application from the list of available scopes.
- Click Create.
Add Your Talkdesk App Info to Ampersand
- Log in to your Ampersand Dashboard.
- Select the project where you want to create a Talkdesk integration.
- Select Provider Apps.
- Select Talkdesk from the Provider list.
- Enter the previously obtained Client ID in the Client ID field and the Client Secret in the Client Secret field.
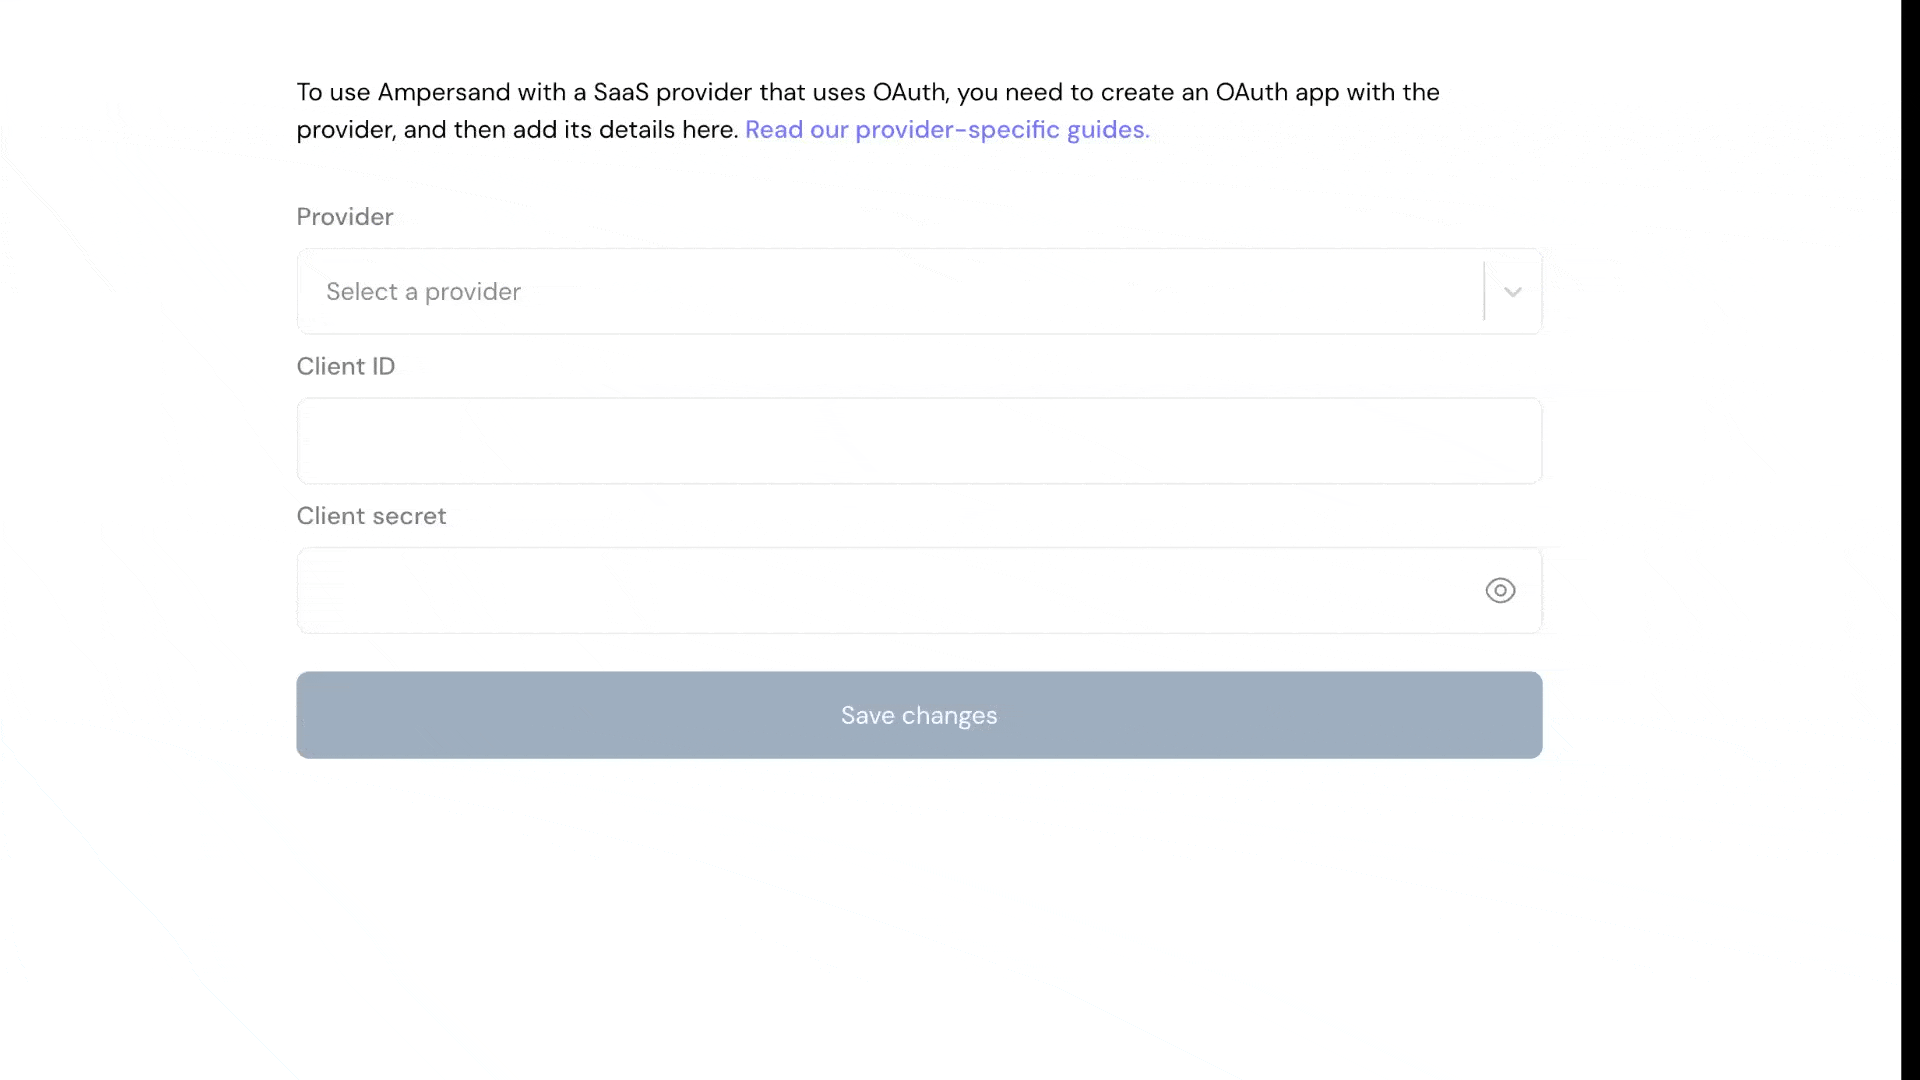
- Enter the scopes set for your application in Talkdesk.
- Click Save Changes.